Running the Cardano Node
Acquire the Node
There are several options on acquiring the cardano-node and cardano-cli binaries.
- Intersect MBO offers pre-compiled static binaries on their cardano-node releases page
- Static or Dynamic binaries may also be built from source
The pre-compiled static binaries will not work in our case, since Raspberry Pis run on ARM architecture (aarch64).
While Raspberry Pi5 single board computers pack a punch for their small size, compiling cardano-node and cardano-clifrom source would likely take the duration of the workshop to complete.
Also, dynamically compiled binaries require specific libraries (in our case: libsodium, secp256k1, and blst, each of which need to be compiled on their own).
So for this workshop we will lean on the gracious efforts of the Armada Alliance, specifically efforts of ZW3RK pool, who provides statically compiled binaries for aarch64, which means that these should run on most distributions of linux as the dependent libraries are part of the compiled binary.
Let's grab our statically compiled cardano-node and cardano-cli binaries from a local server (also a Raspberry Pi5) and copy them to the directory we added to our path /home/n(X)/preview/bin/
cd /tmp
wget -c https://github.com/armada-alliance/cardano-node-binaries/blob/main/static-binaries/cardano-10_4_1-aarch64-static-musl-ghc_9101.tar.zst?raw=true -O cardano-binaries.tar.zst
If you are using amd64 CPU architecture, make sure and grab the right binary from the releases page rather than the Armada Alliance arm binary in the instructions.
Extract cardano-node and cardano-cli from the download.
tar -I zstd -xvf cardano-binaries.tar.zst --wildcards '*cardano-node' '*cardano-cli'
Copy cardano-node and cardano-cli to the bin directory we created.
cd cardano-10_4_1-aarch64-static-musl-ghc_9101
cp cardano-node /home/n(x)/preview/bin/
cp cardano-cli /home/n(x)/preview/bin/
Now let's remove the archive (saves a small bit of space)
cd /tmp
rm cardano-binaries.tar.zst
Lastly, let's check the versions
cardano-cli --version
You should see the following output
![]()
cardano-node --version
Output again
![]()
Running the node
In order to run, the cardano-node will require some configuration files alongside a few startup flags
The node requires the following files to run as a basic node or relay (non-block-producing):
- Main configuration file: contains node settings and points to the Shelley, Byron, Alonzo, and Conway Genesis files.
- Byron Genesis: contains initial protocol parameters and instructs
cardano-nodeon how to bootstrap the Byron Era of Cardano. - Shelley Genesis: contains initial protocol parameters and instructs
cardano-nodeon how to bootstrap the Shelley Era of Cardano. - Alonzo Genesis: contains initial protocol parameters and instructs
cardano-nodeon how to bootstrap the Alonzo Era of Cardano. - Conway Genesis: contains initial protocol parameters and instrudts
cardano-nodeon how to bootstrap the Conway Era of Cardano. - Topology File: contains list of bootstrap, local, and public peers. (Peers are other nodes running Cardano)
Let's grab these files
cd /home/n(x)/preview/config

wget https://book.world.dev.cardano.org/environments/preview/config.json
wget https://book.world.dev.cardano.org/environments/preview/topology.json
wget https://book.world.dev.cardano.org/environments/preview/byron-genesis.json
wget https://book.world.dev.cardano.org/environments/preview/shelley-genesis.json
wget https://book.world.dev.cardano.org/environments/preview/alonzo-genesis.json
wget https://book.world.dev.cardano.org/environments/preview/conway-genesis.json
wget https://book.world.dev.cardano.org/environments/preview/peer-snapshot.json
Before starting the node, we need to ensure that our topology file contains the full path of our peer-snapshot.json file, so the node starts properly.
Let's edit the topology.json file.
nano /home/n(x)/preview/config/topology.json
ctrl+o to save and ctrl+x to exit.
Now add the full path of the peer-snapshot.json (make sure to adjust the username from n19 to your username)
![]()
Now that things are in place, let's run the node.
cardano-node run --topology ~/preview/config/topology.json \
--database-path ~/preview/test-db \
--socket-path ~/preview/socket/node.socket \
--port 1694 \
--config ~/preview/config/config.json
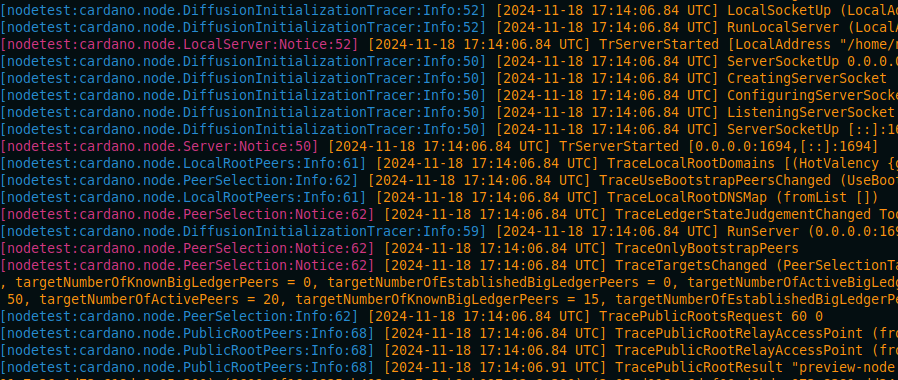
You should see the output of your node starting up in your terminal window.
The next thing I'd like you to do is to open up an additional ssh session to your Raspberry Pi server while the node runs.
Once connected, please query the tip of the chain to see how quickly the blockchain is syncing from scratch.
cardano-cli query tip --testnet-magic 2
You can observe active syncing by using the watch command
watch -n 1 cardano-cli query tip --testnet-magic 2
The --testnet-magic flag allows us to specify the different testnets. For example, preprod would be --testnet-magic 1 while mainnet is --mainnet
By now, it should be apparent that we just don't have the time to sync from scratch. It would likely take the duration of the session or more to finish.
Press ctrl + c in the session you currently have the node running in to stop the node.
Once the node has been stopped, remove the database
rm -r /home/n(x)/preview/test-db
If only there were a better way...